Macbook doesn't see the printer. Why the printer does not work: causes and solutions to the problem. Software problem
It doesn’t matter at all what manufacturer your printer is from, what model it is, and what printing method it uses (laser or inkjet), the reasons for equipment failure can only be of two types: technical and software. By technical reasons The device cannot operate if there are problems in its various modules. For example, problems with connection, mechanics, electric drive, or with the cartridge, etc. If there are software glitches, then, as a rule, they are associated with the interaction of printing equipment with a computer.
At first glance, this sounds implausible, but when it turns out that there is no connection with the printer, it turns out that some owners of this equipment forget to do basic things. For example, connect the device to the network or connect it to a computer using a special cable.
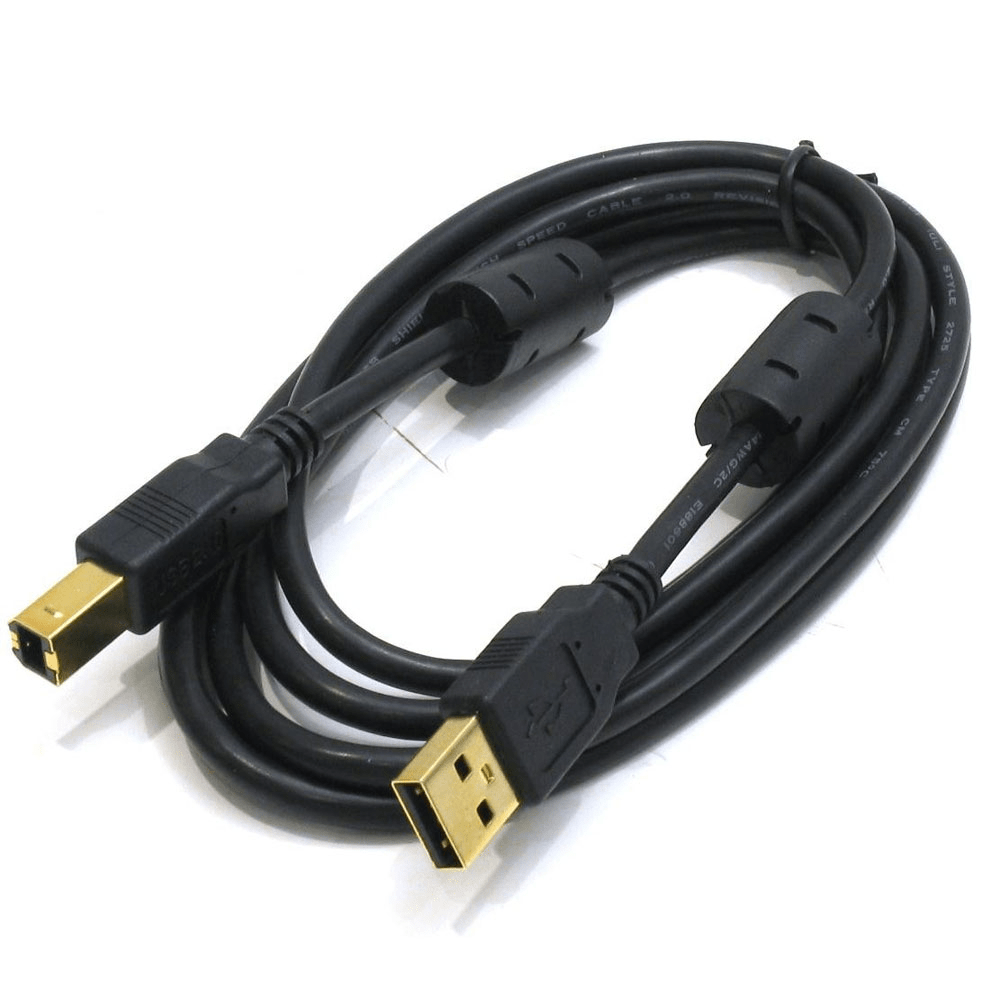
But, when the connection is made correctly, and the machine still does not print, then first of all, you need to make sure that serviceability of the USB cable itself. Sometimes it fails, and a message may appear on the PC screen that the OS does not recognize the device.

In this case, you need to purchase a new cable, preferably of high quality, with protection against interference.
Also, after connecting the device to the PC, it is necessary in the system itself select the desired printer, because Windows (versions 7, 8 and 10) may have multiple printing devices installed, and some of them are virtual.
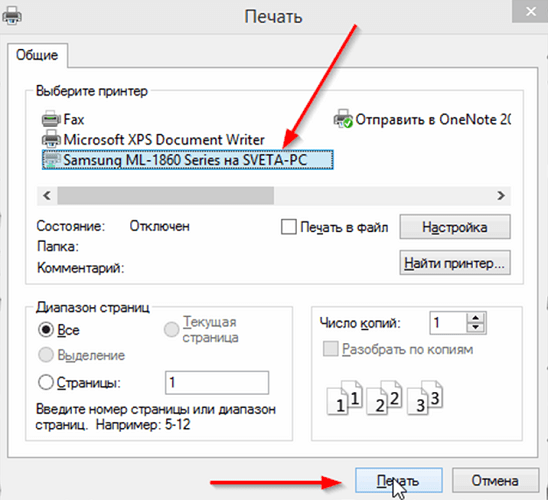
Printer users often, due to inattention or haste, do not pay attention to the choice of equipment at the moment when a document is sent for printing. In the picture above, you can see that the Samsung device installed in the OS was selected.
Default printer can be selected in another, alternative way:
- log in to the “Control Panel”;
- LMB (left mouse button) click on the line or icon called “Devices and Printers”;
- a window will open displaying all the peripherals installed on the PC;
- find the required unit and right-click on it (right mouse button);
- A menu will appear where you need to select “Use as default”.

If the device does not work, you can try restart print manager. Making it restart is simple:
- disconnect the cable connecting the printing device to the PC;
- go to the “Control Panel” through the “Start” button on the PC screen;
- further, follow the path: “System and Security”, “Administration”, “Services”;
- In the “Services” window, find the line “Print Manager” and highlight it.
You can also click on the “Stop” item in the upper left corner of the window, after which the “Run” item will appear, which you will also need to click on. Another option: right-click on “Print Manager” and select “Stop”, and then “Start”, or immediately select “Restart”.

Checking drivers
A problem with drivers—special programs that control equipment connected to a PC—could be the reason why the device stopped working normally.
The driver problem occurs after:
- reinstalling or updating the OS;
- software failure of unknown cause;
- virus attack;
- connecting new peripherals to the PC that conflict with the connected printing equipment.
What to do in such a situation? First, you need to go to the “Control Panel” again, turn on the display of small icons and open the “Device Manager”. Next, while in this window, find the line related to your printing equipment. It may have different names. In the figure below, the line is called “Print Queue”.

You should also check on the dispatcher page to see if there is any equipment opposite a circle or triangle with an exclamation point. Thus, the system flags devices that have a driver problem. If you find an icon next to the name of a printer, you will need to install a driver for it. The driver is installed either from the disk that came with the device, or after downloading it from the Internet.
Typically, drivers can be found on the official website of the equipment manufacturer.
When no warning icon is found, but the device still does not turn on, it is still recommended to reinstall the driver.
To do this, in the device manager, select the desired unit and at the top of this window, click on the screen image with a cross. This procedure will remove the hardware from the system. After removing the device from the system, you will need to reinstall the drivers. This can be done, as already mentioned, either from the installation disk, or by running the downloaded file. Sometimes drivers, and to install them, you need to click on the “Update hardware configuration” button in the manager window and find the line that appears with the equipment, opposite which there is an icon (!). Next, having selected it, click on the “Update driver” icon located at the top of the window and follow the instructions that appear. The system will prompt you to find drivers on the Internet or install them from your computer. Specify the folder in which you unpacked the drivers downloaded from the Internet. After installation, it is recommended to restart your PC.
Setting up a print queue
Very common cause The reason your printing device refuses to work is a failure that is directly related to the print queue. In this case, the system queues the document, but the unit does not start working. This can happen due to a power surge in the network or for software reasons if the device is used as a network device and is connected to several PCs. In this case, a special file created by the system when the user sends the file for printing is damaged. However, the equipment is often gives a printing error.
To fix the error you need to do the following.

After this simple procedure, the printing equipment, in most cases, returns to working condition. But, although rare, a situation arises where the print queue is not cleared and the print error continues to appear. In this case, you can resort to the following method:
- disconnect the cables connecting the printing device and the PC and disconnect the unit from the network;
- go to “Services” as indicated above and stop “Print Manager”;
- next, open Windows Explorer and paste C:\Windows\System32\Spool\PRINTERS into the address bar, then press Enter;
- in the folder that opens, delete the files in it;
- turn off the PC;
- Before connecting the printing device to the network, make sure that at least 60 seconds have passed. after unplugging it from the outlet;
- Having connected the device cable to the PC, you should turn on the unit with the button intended for this;
- After turning on the PC, wait until operating system will load completely;
- Now you can try sending the file for printing.
If this method also turned out to be ineffective and the document could not be printed, then it is recommended to use special programs that the equipment manufacturer offers for users of their equipment. For example, for HP printing devices, there is “HP Print and Scan Doctor” program, which can be downloaded for free from the official HP website.
Typically, these programs search for and correct problems with equipment automatically.
Checking ink and paper
When the machine refuses to print or comes out with blank sheets, it may be out of ink. Although the equipment self-diagnosis program successfully detects this fact and generates an alert with an error code, in some situations there may not be a warning, for example, if a CISS is used or the toner level count on the cartridge is frozen.
Determining the ink level in the inkjet
If you use original cartridges, then to find out at what stage the ink level of an inkjet printer is, you can use the service program that comes with the printing equipment. Using the Epson device as an example, this is the “Status Monitor” program. To open this program, just find the printer icon located in the tray and double-click on it with LMB. Next, on the “Service” tab, select “Status Monitor”.

If you don't find the tray icon, you can find the hardware in Control Panel by going to Devices and Printers.
For HP devices You also need to double-click on the unit icon in the tray. Further:
- you should select “Settings” and open the “Functions” window;
- In the tab that appears, click on the “Printer Services” button;
- After that, select the “Ink Level Information” tab.

For Canon units The actions are similar to those described for Epson devices, only in the “Service” tab you should select the “Printer Status” line, after which a window will appear where data on the ink level will be displayed.

In the case of using CISS, the ink level in the containers is determined visually, since they are transparent.
Determining the amount of toner in a laser printer
If you need to determine the toner level in a laser printer where the chip is “frozen,” this can also be done visually: the unit prints poorly (the image or text on the pages becomes faded), white streaks appear, or a blank sheet comes out altogether. These signs indicate that the toner cartridge is running low.

If you are using original cartridge or self-resetting When counting the amount of toner is possible, do the following:
- press the “Print Screen”, “Print”, “Cancel” button (depending on the equipment manufacturer) and hold it for at least 5-7 seconds;
- As a result, the machine will print a page with a report, where you should find the line “Toner Remaining”, which translates as “Remaining toner”.

It should be remembered that this information is inaccurate, and the error can reach up to 50% of the actual amount of powder.
Sometimes, if your device begins to produce poor quality when printing, the following method helps: take the cartridge and shake it, then insert it back into the laser printer. This method sometimes helps when, by all indications, the toner is running low, and the document urgently needs to be printed.
Checking the paper in the device
If the machine stops printing due to paper running out or jamming, a warning with an error code should appear. But sometimes this does not happen, so you will have to inspect the “insides” of the unit.
Paper jams often occur because the user uses to save money. used sheets, for example, by printing information on the reverse side. Such paper, in some cases, may be wrinkled, have kinks, etc. Therefore, it is not always possible to place it in an even stack in the paper tray. During operation of the device, when a sheet is grabbed, it can become skewed and crushed, which is why the equipment stops.
If you see that the paper has jammed, then you need to remove it carefully, without much effort or jerking. Users sometimes make this mistake, as a result of which they may remain in the device case. small scraps of paper, the location of which cannot be immediately determined. This may cause a crash. To find a piece of paper, you need to open the cover of the unit and remove the cartridge from it (if it is a laser printer), or with the device turned off, move the carriage with cartridges (if you have an inkjet printer). After finding scraps of paper, carefully remove them from the unit body. They are usually located on a shaft or rollers.
The reasons why a printer, like other complex electronics, does not work can be caused by many factors. They may appear as a result of improper operation by the user, wear of various parts, or disruption of operation stability (voltage drops, etc.)
This material will discuss the reasons why an HP printer or any other model does not work. Methods for troubleshooting many problems will also be given.
What could be the culprit?
To date, several of the most common reasons have been identified that can cause the printer to stop working. Here is their list:
- There was a problem or error connecting your device to your computer.
- Why doesn't my Canon or other model printer work? When attempting to print a document, the user selected the wrong device option. As a result, printing is impossible.
- An error occurred during the operation of the device itself, which stopped the work.
- There is no paper in the device or it has become jammed.
- The drivers have not been updated for a long time or were deleted due to some error.
- One or more cartridges were empty or incorrectly filled.
It is worth noting that these are only the most popular options for why a Samsung printer or any other model does not work. The reasons for any breakdown will be unique to each situation.
Attention! Despite the fact that most faults can be fixed by the user within ten minutes, you should not attempt repairs yourself if you are not confident in your own abilities.
Connection error
A fairly common and even banal error that leads to the printer stopping working. Sometimes users may connect the wires incorrectly. And sometimes they simply forget to plug the power cord into the outlet. At the same time, other errors related to working from the network may also be the culprits of the malfunction.
How to fix?
Are you not sure that the error may be related to the connection, and want to know why your HP Laserjet or another model printer is not working? First, just check all the wires:
- Pay attention to the power cord. If it is plugged in, check how tightly it fits.
- Next, check the cable that goes from the printer to the computer. Make sure there is no damage along its entire length and that everything is plugged into the correct connectors.
- Restart your computer and printing device. Pay attention to the state of the indicators of the latter. If something has changed, look up this value in the instructions that come with the kit.
Invalid device
Quite often among printing gadgets you can see several options. Even though you only have one. These instances are a virtual device and have virtually nothing to do with what you use to print documents.
It is the fact that the user sends the necessary file to the virtual device that is the answer to the question why the printer does not work if it is connected correctly.
What will fix the situation?
To eliminate this unpleasant situation, simply set your own printer as the default printing device. Then the system will automatically use it for work. You can do it this way:
- In the search bar, enter the phrase "Printers" and open the application for managing these devices.
- In the list that opens, find the device you are using and right-click on its shortcut.
- As soon as the context menu opens, check the "Set as default" line.
This should solve the problem of why the printer is not working or printing. However, keep in mind that if there are several devices for working with papers, you will still have to choose one of them each time.
An error occurs in the queue
Sometimes it may happen that even a new printer stops working. Here it is worth paying attention to the processes that were launched. Perhaps one of them is stuck. This led to an error in the print queue.
How to fix freezing?
To fix this problem, you need to look at the queue itself and remove processes that interfere with work. You can do it this way:

- enter the word “printers” in the search bar;
- select the required section in the list of results;
- after opening a new window, click on the line with the name of your printing device (it will be on the right side of the screen);
- after activation, three buttons will appear, one of which will offer to open the print queue; activate it;

- then you should see a list of documents that need to be printed; just delete them all and start a new process.
Software problem
Another reason for printer failure is drivers. If this is your first time connecting your device to the network, most likely they are completely missing. The same thing happens when setting up a device with a newly installed operating system.
Alternatively, the drivers could be quite outdated, and therefore ensuring stable operation of the printer is no longer possible.
Where can I get them?
There are two ways to update drivers for many devices: different ways. The first involves downloading them from the Internet, from the device manufacturer’s website. To perform the second, you need to use the device manager. Since it is more complex, let's look at it in more detail:
- Using the Windows search bar, enter the phrase "device manager";

- in the list of results, select "Standard applications";
- after going to the program window, find your printer in the list of all devices connected to the computer;
- right-click on its shortcut and activate the driver update line;

- Next, you need to indicate where to look for this software;
- After all the instructions, the system will begin searching for drivers available for installation.
Let's now look at some of the printer components.
Working with cartridges
One of the main parts that may be the reason why the printer does not work. To prevent this from happening, cartridges must be changed regularly. This is determined by the deterioration in color quality during printing.
However, it also happens that almost immediately after replacing this element, the device stopped printing. Let's look further at why the printer cartridge does not work. And also what to do so that the error does not occur again.
Causes of malfunctions

At the moment, there are quite a few options for why the printing device does not work after changing or long-term use of cartridges. Here are some of them:
- The part was installed incorrectly. Or it was not prepared for work (the lid was not closed tightly, the protective films were not removed).
- The air ducts were dirty.
- There is dried ink or an air pocket inside the print head.
- The ink loop of the CISS was pinched or clogged.
- The limit on the number of print processes allowed has been reached.
- A non-original part was installed.
- The cartridge turned out to be faulty and damaged.
Removing dried paint
This is quite common. Occurs in situations where the printer has not been used for a long time. You can clean the outlet using a special utility that is installed on all modern models devices for printing. You can start the process through the toolbar in the printer application. Most often it can be found under the name “cartridge cleaning”.
During cleaning, a special pump is started. It pushes ink under pressure through the inlet of the cartridge. As a result, air or dried ink escapes.
If the device model is old enough, then this process will have to be performed manually.
Installation error
If for any reason you had to remove the cartridges, then pay attention to how they were installed. You can also read the instructions that come with the kit. Although in general, this is not such a difficult process.
When installing, make sure the cartridge cover is tightly closed. Otherwise, printing will result in spots, streaks, or almost completely black pages.
Also make sure that after installing the part back into the housing, various small debris does not get there, which can lead to clogging of the inlet.
Here is a small list of consequences that arise when cartridges are installed incorrectly:
- printing is done in only one shade;
- with an absolutely full ink carrier, the printout looks extremely pale;
- Instead of a document, spots of different colors remain on the paper.
Conflict at work
Another option for why the printer does not work after installing new cartridges. If, after changing the original part, a conditionally suitable one was installed, then such defects may appear as:
- Various stains remain during printing;
- complete absence paints on paper;
- lackluster result.
All this is a symptom of incompatibility between the printer itself and new cartridges. Most the best option- try to find original ones.
What about the scanner?
It also happens that the scanner in a completely new printer refuses to work. It is worth noting that this is a fairly common phenomenon that is quite easy to fix. Let's figure out why the scanner in the printer does not work.
The first thing you should pay attention to is the drivers. Solving this problem is quite simple:

- Using the search bar, go to "Device Manager";
- Among the list of all devices connected to the computer, find your printer scanner and right-click on it;
- in the context menu that appears, select the driver update line;
- indicate where to look for the software and wait for the process to complete.

You can also find them on the website of your device manufacturer.
Additional problems and solutions
Below is a set of the most common options for why a scanner on a printer may not work. It is worth noting that many of them are also the reason for the lack of functionality of the printing device itself:
- The power supply or wire was damaged due to violation of operating rules or due to defects. Here you need to either find the same part, or simply exchange it under warranty.
- The cable connecting the computer and the printer is faulty. Try to find a replacement for him.
- The malfunction of the scanner was caused by sudden power surges in the network. As a result of frequent repetition of this process, the printing device may completely fail. If you detect any surges, simply turn off the device.
- Incorrect printer settings. In this case, it is recommended to perform a factory reset.
For some users, it can be critical when the printer does not print at the most inopportune moment, which in some cases can stop the activities of organizations. In order to quickly resolve this problem, we will try to describe everything possible reasons and ways to solve this problem in this article.
The printer does not print: what to do?
Why the printer does not print - there can be two reasons:
- software (Windows error, driver, application)
- hardware (device, power, paper, or ink problem)
Software error
Check availability
Open Devices and Printers (Win+R - control printers) and check the availability of your device.
If it is not in the corresponding tab (it may be in the devices or other devices tab), and in the task manager in the Printers item there is a yellow triangle with an exclamation mark on the device icon, then the driver has failed and because of this the printer has stopped printing - reinstallation will be required drivers.
To reinstall, you can use 3 methods:
- Installation via the Center Windows Updates(Right click on the printer in Device Manager and Update driver - Automatic search)
- Installing the “old” version of the driver (Update driver – Search for a driver on the computer – Select from the list of available ones)
- Installation from the manufacturer’s website (google the model you have specified, download the appropriate driver and install)
If these steps do not help, try removing all devices (along with the software) and re-installing the driver from the manufacturer's website.
Default printer

Sometimes, after installing a driver or updates on Windows, the default driver may fail. Everything is fine in the device settings, the device is displayed and works, but when sending for printing, nothing happens.
In this case, you need to manually set the device that will be used.

Restarting Print Manager
The printer has stopped printing, what should I do if the previous steps did not help? Let's move on to the next step. Open the Services window (Win+R – enter services.mcs) and look for Print Spooler.

Click LMB on the service and select Restart; if no error occurs, we try to send the document for printing.
Clearing the print queue
Also, the reason may be that all documents are stuck in the queue and need to be cleared. This may also be the case network printer, it doesn't print because it has too many hits logged.
To begin with, you can open the queue through the settings and clear it.

If this does not help, then we will do everything manually. To do this, first stop the Print Spooler service from the previous version or enter net stop spooler in the command prompt window as administrator

And then we clear the contents of the folder C:\Windows\System32\spool\PRINTERS, and then turn the service back on (command - net start spooler).
Environment Variables
If the environment variables for temporary files have been changed, the printer may stop printing, since some drivers are set to the limit of saving temporary files on the system disk, and not on the one specified by the system.
Go to System – Additional system parameters – Advanced – Environment variables.
The TMP and TEMP variables must be set to the following values:
%USERPROFILE%\AppData\Local\Temp

Also, due to system errors, an access error to temporary files may occur, so it is recommended to provide full user access to this folder.
Both along the path %USERPROFILE%\AppData\Local\Temp, and to the folder C:\Temp

Troubleshooter
The last resort would be the standard Windows trawlshooter. Open the window Taskbar - Troubleshooting - Using the Printer.

If after completing the steps, printing does not resume, then proceed to the next step.
Hardware error
Paper - jammed or missing
If the error is due to a paper jam or missing paper, some devices will report this. For example, in the case of the Canon LPB 2900, the red indicator will be on, indicating a problem with the paper:

In any case, open the paper feed cover and check the paper supply for any torn pieces of paper or other foreign objects on the paper feed drums. If something is in the way, unplug the device and carefully remove the item.
Out of toner or ink
As with paper, many current MFPs warn about the problem of running out of ink or toner. Try removing the cartridge and reinserting it, and then check.

Nutrition
If the problem is connection or power, then try the following options:
- Power off
- Using a different USB port for connection
- Using a different USB cable/power cable
Repair
Well, the most extreme and unpleasant option is to call a repairman or take it to Service center for diagnostics.
Have a great day!
One of the most common reasons for this problem is trivial - chosen wrong printer in print settings. In this case, you just need to start printing again, but in the settings change printer to the one currently in use. A situation may arise in which your printer is not in the list of devices. In this case, you should first check connection devices to the computer.
All modern printers are connected for normal operation ByUSBinterface to the computer and a regular network cable to the source nutrition. Check the entire length of these two cables, along with any adapters, splitters, or extension cords if used. If everything looks fine, check the power source (outlet) and USB input.
To check the power supply, you can use a device that you are sure is working; if it does not work, simply connect printer to another location. The USB input can be checked in the same way as the power supply, but you will have to use a flash drive. If the printer is still not visible, try check drivers. Drivers must match your device model and be compatible with the installed operating system.
Even if you have updated the drivers, but the device is still not detected, the computer may be infected viruses. In this case, you should immediately begin treatment. But if printing is urgent, you can try starting the computer in safe mode. To do this, click F8 during system boot and select “ safe mode” or “safe mode”.
Problems with the print queue
The next reason is also common, but fixing it is a little more difficult. The problem may be “ frozen” print queue. You just need reboot computer, but if this does not help, you will have to clear the print queue manually. This is done in the control panel, in the “ tab devices and printers” (for Windows 8 and above users, you need to open control Panel through the system settings so that there is no confusion). 
Select right click your printer and find the “ view the print queue”.
In the window that opens, click on the “ tab Printer” and select “ clear print queue”.
Another way to fix this problem is starting the service print manager, because sometimes this service for some reason stops working or does not start automatically. To launch it manually, open the control panel and enter “ view local services”
Find the print spooler service and in its properties select auto launch type.

Service properties

Restarting the service
Paper is jammed or missing
Missing or jammed paper can also be a big problem. If everything is clear with the first case, then a paper jam to correct is not as simple as it seems. Try it first eliminate it, replacing the paper. If this does not help, then there may be a problem, either software parts, or in mechanism paper pickup. In this case, you should start with updates drivers.
If this does not help, then you will have to take the printer to a service center, because the problem is mechanical, and such things can be fixed “on the knee” it is forbidden. We also remind you: it is advisable to use only official services to avoid loss of warranty. The main mistake of people who have encountered this problem is that they underestimated its seriousness. After all, many people believe that only very inattentive people make such typing mistakes and, for some reason, do not count themselves among them.
Drivers are faulty
 Even the most reliable printers are not perfect. Literally every possible malfunction can be caused by old, uninstalled or unsuitable for the used configuration drivers.
Updating drivers should usually be done automatically. This can be done manually by downloading and installing drivers from the website manufacturer. At the same time, carefully select the device model and the configuration of your operating system, otherwise the installed drivers will not work incorrect or they won't work at all. Also, if you download drivers from an unofficial site, you can forget about the warranty for the printer.
The cartridge is faulty
Another source of problems is cartridge. It must be refilled as it is used up or a new one must be purchased (depending on the model). It happens that cartridges of different models look very different Seems like, but when installed in an unsupported model, they do not function, so you must always be careful when purchasing a cartridge to avoid wasting money and time.
It is possible that the cartridge breaks down. The printer itself will most likely inform you about this. In this case, you need to use the service service, or buy new cartridge. We remind you that if you use an unofficial service, you will lose the warranty on both the cartridge and the printer in which it will be used.
Printer problems are a real horror for office workers or students who urgently need to pass a test paper. The list of possible defects is so wide that it is impossible to cover them all. This is also due to the active growth in the number of different manufacturers who, although they do not introduce completely new technologies, present various “surprises”.
In this article we will talk about a specific manufacturer, whose products are so popular that almost every person knows about it. But this does not change the fact that high-quality devices, in particular printers, experience breakdowns that many cannot cope with on their own. It is necessary to understand the main problems and options for solving them.
Problem 1: USB connection
Those people who have a printing defect, that is, white stripes, missing lines on a sheet, are a little happier than those whose printer does not appear on the computer. It’s hard not to agree that with such a defect, at least some kind of printing is already a success. In such a situation, you first need to check the integrity of the USB cable. Especially if you have pets. This is not so easy to do, because the damage can be hidden.
However, a USB connection is not only a cord, but also special connectors in the computer. Failure of such a component is unlikely, but it still happens. It's very simple to check - remove the wire from one socket and connect it to another. You can even use the front panel if we are talking about a home computer. If the device is still not detected, but you are 100% confident in the cable, then you need to move on.
Problem 2: Printer drivers
You can't connect a printer to your computer and expect it to work correctly if you don't have drivers installed for it. This is relevant, by the way, not only when you first start the device, but also after using it for a long time, since the operating system is subject to constant changes and damaging the files of any software is not such a difficult task.

The driver is installed either from the CD on which similar software is distributed when purchasing a new device, or from the manufacturer’s official website. One way or another, you only need to download the most up-to-date software and then you can count on the computer to “see” the printer.
On our website you will find individual instructions for installing printer drivers. Follow this link, enter the make and model of your device in the search field and check out all the available methods for installing/updating software for HP.

If this does not help, then you need to check for viruses, as they can simply block the operation of the device.
Problem 3: The printer prints in stripes
Such problems quite often worry Deskjet 2130 owners, but other models are not free from this possible defect. The reasons may be completely different, but it is necessary to combat this, because otherwise the quality of the printed material suffers greatly. However, an inkjet printer and a laser printer are two big differences, so you need to understand them separately.
Jet printer
First you need to check the ink levels in the cartridges. Quite often, it is a small amount of a special substance that leads to the fact that not the entire page is printed correctly.

Laser printer
It is fair to note that laser printers suffer from this problem much more often and it manifests itself in a wide variety of variants.
- For example, if stripes always appear in different places and there is no pattern, this can only mean that the rubber bands on the cartridge have lost their tightness, it’s time to change it. This is a defect that is specific to the Laserjet 1018.
- If there is a black line in the middle of the printed sheet or black dots are scattered across it, this indicates a poor-quality toner refill. It is best to perform a complete cleaning and carry out the procedure again.
- There are also parts that are quite difficult to repair on your own. For example, a magnetic roller or photodrum. The extent of their damage is best determined by specialists, but if nothing can be done, then it is best to look for a new printer. The price of individual parts is sometimes comparable to the cost of a new device, so it makes no sense to order them separately.
In general, if the printer can still be called new, then the problems can be eliminated by checking the cartridge. If the device has been working for more than a year, it’s time to think about more serious things and conduct a full diagnosis.
Problem 4: The printer does not print black
This situation is a common occurrence for owners of inkjet printers. Laser analogues practically do not suffer from such problems, so we do not consider them.
- First you need to check the amount of ink in the cartridge. This is the most trivial thing you can do, but beginners sometimes don’t know how much coloring material is enough, so they don’t even think about the fact that it could have run out.
- If everything is fine with the quantity, you need to check its quality. Firstly, it must be paint from an official manufacturer. If the cartridge has already been completely changed, then this cannot be a problem. But when refilling with low-quality ink, not only the container for it, but also the printer as a whole can deteriorate.
- You also need to pay attention to the print head and nozzles. They may become clogged or simply damaged. The utility will help you deal with the first one. Cleaning methods have already been described earlier. But replacement is, again, not the most rational solution, because a new part can cost almost as much as a new printer.
If we draw any conclusion, then it is worth saying that this problem occurs due to the black cartridge, so replacing it most often helps.
This concludes the analysis of the main problems associated with HP printers.